
You are five minutes away from wrapping a gift and there is not a single store-bought bag in sight. Sound familiar? It happens to most of us at least once a year, usually right before a birthday party or during the holiday rush. The good news is that a sheet of wrapping paper, a little tape, and a pair of scissors is genuinely all you need.
Making a gift bag from wrapping paper is not a compromise — done well, a handmade bag actually looks more thoughtful and personal than anything you would pull off a shelf. This guide will walk you through the whole process, from cutting the paper to adding handles, and share some tricks that will make yours look like it belongs in a boutique window.
How to Size Your Wrapping Paper
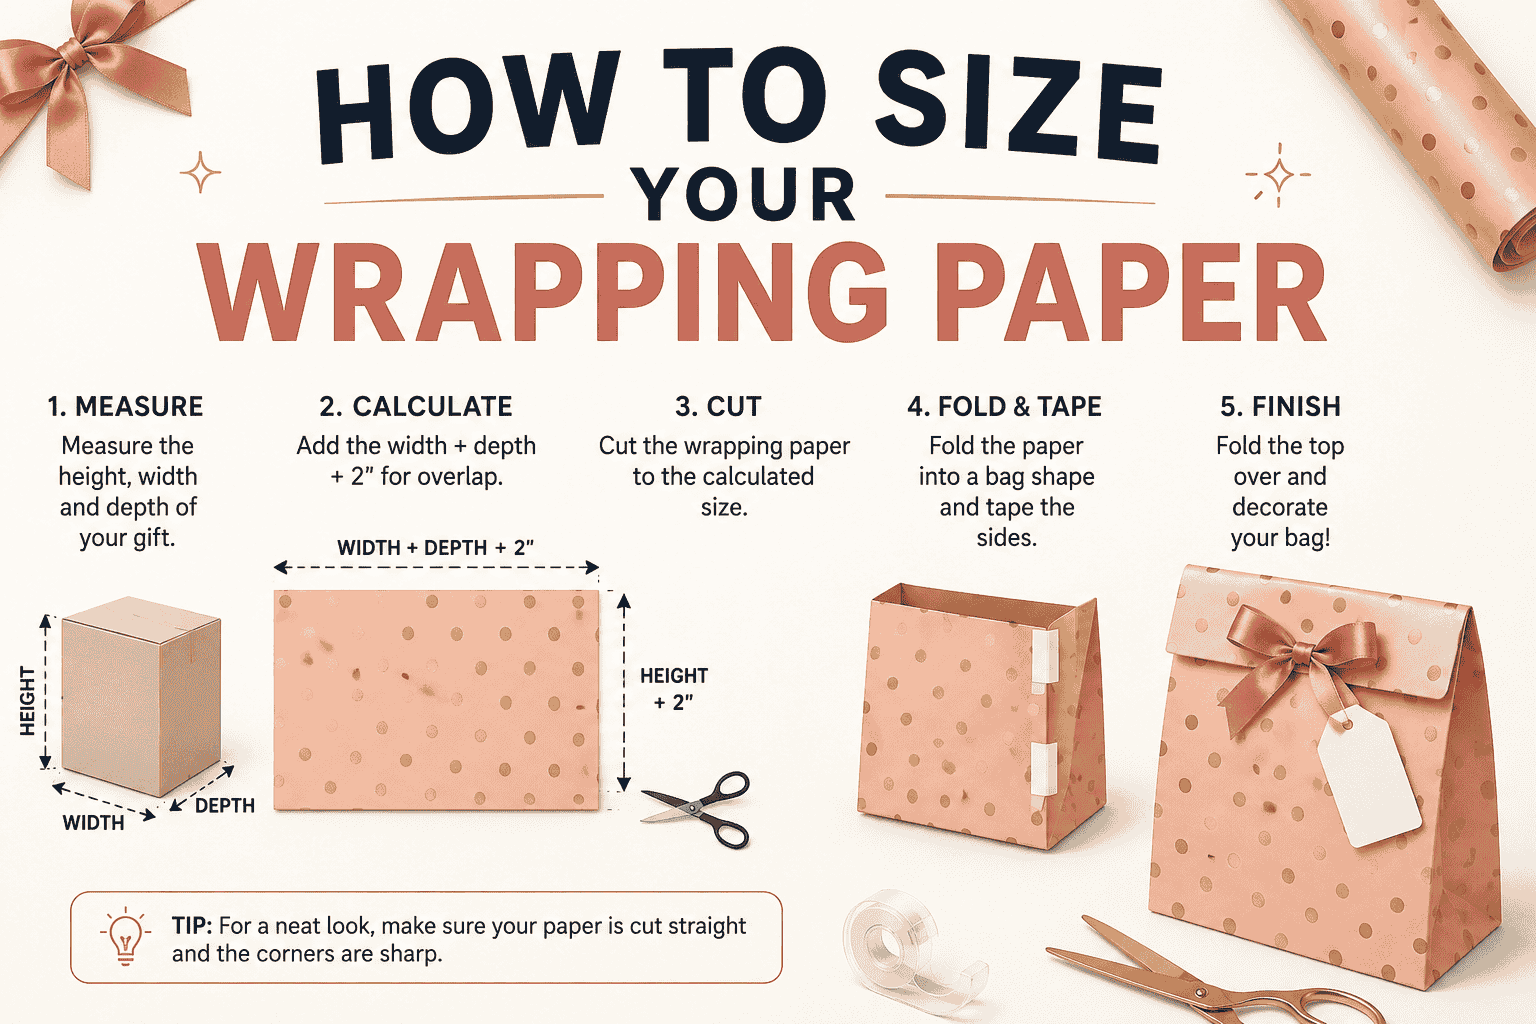
This is the step most people skip, and it is the reason most homemade gift bags end up lopsided or too shallow to close properly.
Before you cut anything, do a rough test. Place your gift on the paper and loosely fold the sides around it the way you would if you were wrapping it normally. You want enough paper to:
- Wrap fully around the gift with a 2-inch overlap at the back seam
- Extend at least 3 to 4 inches below the gift (this becomes the base)
- Rise 4 to 6 inches above the gift (this becomes the top flap and handle area)
How to Make a Bag Out of Wrapping Paper
Step 1: Cut Your Paper
Lay the wrapping paper face down on a flat, clean surface. Measure and cut your sheet to the size you worked out above. Take your time on this cut — a straight edge makes the whole bag look much cleaner.
Step 2: Fold in the Sides
With the paper still face down, take the left edge and fold it toward the center. Then take the right edge and fold it over so the two sides overlap by about 2 inches in the middle. Run your finger firmly along both folded edges to crease them sharply.
You now have a vertical tube of paper, open at the top and bottom. Tape the overlapping seam down the back so it holds. This seam will sit at the back of the finished bag, so it does not need to be perfect — but make sure the tape holds firmly all the way down.
Step 3: Create the Base
Now you need to build a flat bottom for the bag. Fold the bottom edge straight up by about 3 to 4 inches (more if your gift is wide or heavy) and crease it sharply. Then unfold it again — you are just making a guide crease, not the final fold.
With the bottom edge unfolded, pinch the left and right sides inward at the base so the paper forms a diamond or triangle shape at the bottom corners. This is exactly the same technique used when wrapping the ends of a boxed gift. Press both triangular flaps flat.
Fold the front and back flaps of the base up and over, one at a time, and tape them firmly in place. Make sure all the edges are sealed — this is the part of the bag that bears the weight, so do not be shy with the tape.
Step 4: Open and Shape the Bag
Reach inside the bag and gently push out the sides and base to open it up. Run your fingers along the edges to sharpen the four vertical corners of the bag. The bottom should open into a flat rectangle.
At this point you have a functional paper bag. Give it a gentle squeeze — it should feel reasonably sturdy. If anything feels loose, reinforce it with more tape on the inside.
Step 5: Add a Reinforced Rim at the Top (Optional but Recommended)
Fold the top edge of the bag down toward the inside by about 1 inch and crease it all the way around. This creates a reinforced rim that looks clean and gives the bag extra strength at the top, which matters if you are going to punch holes for handles.
Bag Size Guide: Quick Reference
| Gift Size | Paper Size | Base Fold Depth |
| Small (ring box, small book) | 30 × 35 cm | 2.5 cm |
| Medium (candle, mug, scarf) | 40 × 50 cm | 4 cm |
| Large (sweater, shoes) | 55 × 65 cm | 5–6 cm |
| Extra large (board game, bottle set) | 65 × 75 cm | 6–8 cm |
Handle Options: Which Material to Choose
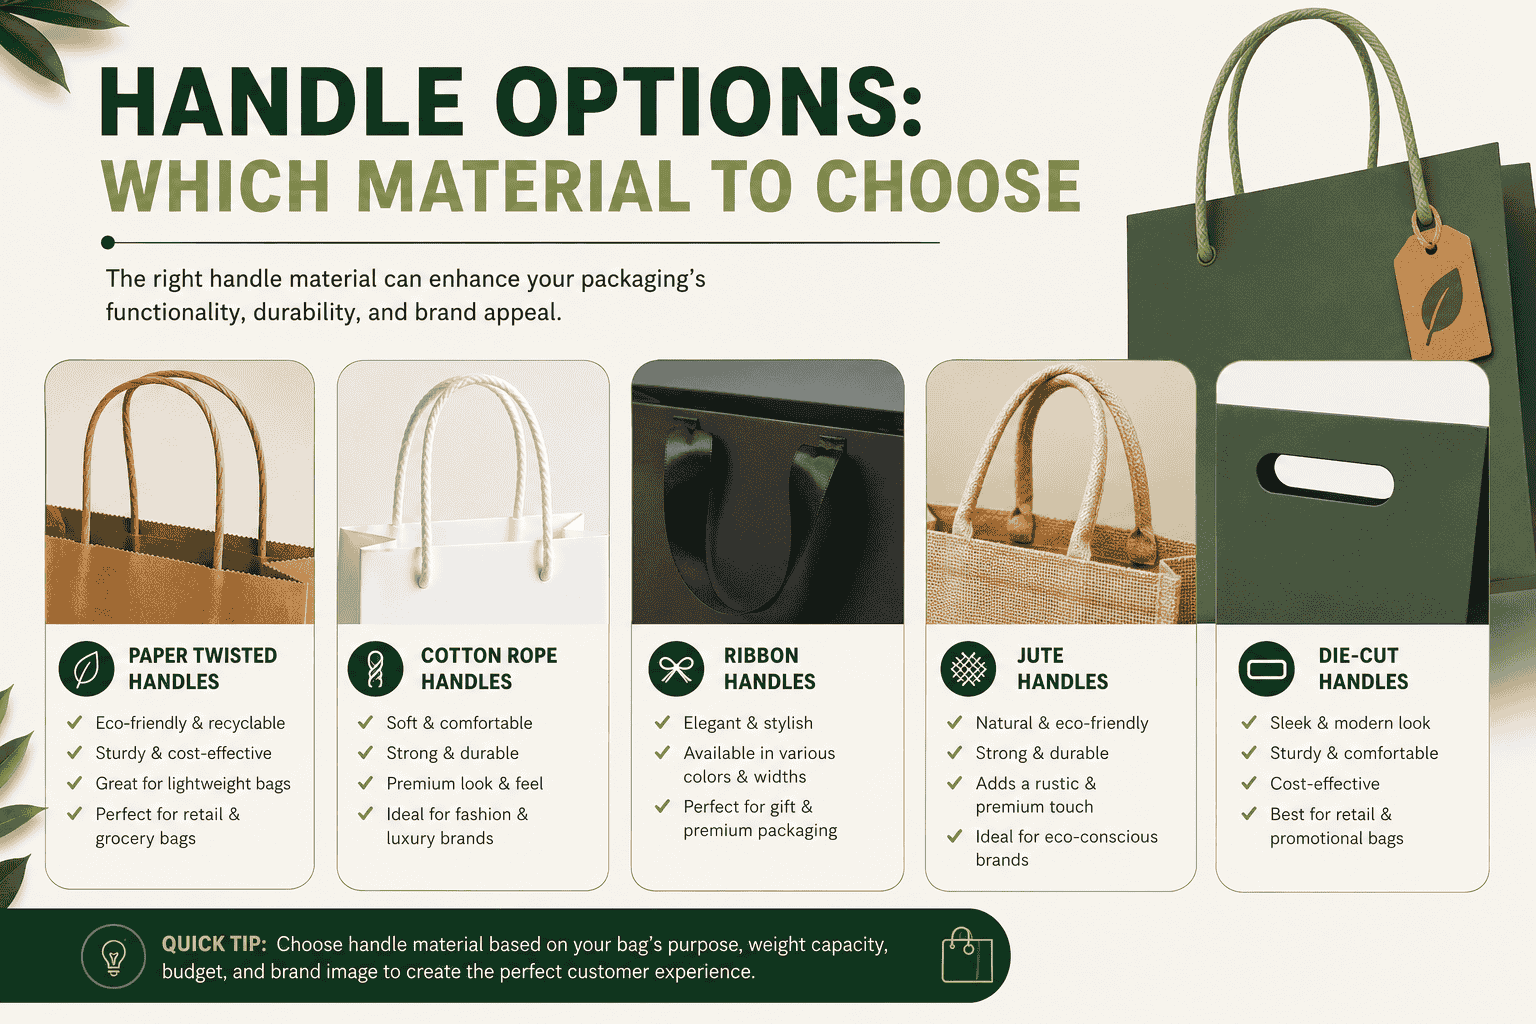
The handle is where a homemade bag can go from looking functional to looking genuinely lovely. The material you pick sets the tone for the whole gift.
Satin Ribbon — The classic. Soft, shiny, and available in every color. Satin ribbon photographs beautifully and ties into a neat bow easily. The downside is that it can cut into the holes over time if the bag is very heavy.
Grosgrain Ribbon — Ribbed, matte, and very strong. This is a better choice for heavier gifts since it does not stretch or cut through paper the way satin can. It has a slightly more casual look, which works well for everyday gifts.
Jute or Hemp Twine — Rustic, natural, and eco-friendly. Works especially well with kraft paper bags or any packaging that has an organic or handmade feel. Rough enough to grip well through the holes.
Cotton Rope or Cord — A soft, modern choice. Twisted cotton cord comes in natural and colored options and gives bags a boutique-style look. It is strong and does not fray easily.
Paper Ribbon — If you want to keep the whole bag from a single material, paper ribbon twisted and folded back on itself can work as a handle. It is less sturdy than fabric ribbon but can look very intentional and polished.
How to Decorate Your Handmade Gift Bag
The construction is just the beginning. Here is where you can make the bag personal:
Washi Tape Accents — Run a strip of patterned washi tape along the edges or the base for a pop of color and some extra reinforcement at the same time.
A Gift Tag — Write directly on a small card, punch a hole in it, and thread it onto the ribbon handle before tying the final knot. The tag becomes part of the bag’s design.
Stamps and Ink — If you used plain or kraft paper, rubber stamps let you add patterns, initials, or simple illustrations that make the bag look custom-made.
Stickers and Labels — A round wax seal or a sticker placed over the back seam hides the tape and adds an elegant finishing touch.
Tissue Paper — Stuff the inside of the bag with coordinating or contrasting tissue paper. Let it billow out the top. This hides the gift, fills any awkward space, and makes the whole thing look intentional and generous.
Dried Flowers or Greenery — Tuck a small sprig of eucalyptus, dried lavender, or rosemary under the ribbon. It looks beautiful and makes the bag smell wonderful when the recipient opens it.
Different Styles You Can Make
Once you have the basic technique down, a few small changes open up completely different looks:
The Gathered Top — Instead of folding the top down neatly, gather the paper together above the gift and tie it with a long ribbon or cord. The result looks like a wrapped posy. Works best for oddly shaped items or very lightweight gifts.
The Accordion Top — Fold the top edge down repeatedly in alternating directions (like a paper fan) before punching the holes. When you thread the ribbon through, the accordion fold fans out on either side of the handle for a decorative effect.
The Window Bag — Cut a small rectangle from the front of the bag before assembling it. Tape a piece of clear cellophane to the inside of the cutout. This allows a peek at what is inside — beautiful for food gifts like cookies or chocolates.
The Double-Layer Bag — Use two different wrapping papers — one patterned, one solid. Assemble them as a single double-thick sheet. The solid paper on the inside gives the bag more body, and if the outer paper has a cut-out window, the inner paper creates a color contrast.
When to Make Your Own Bag vs. Buy One
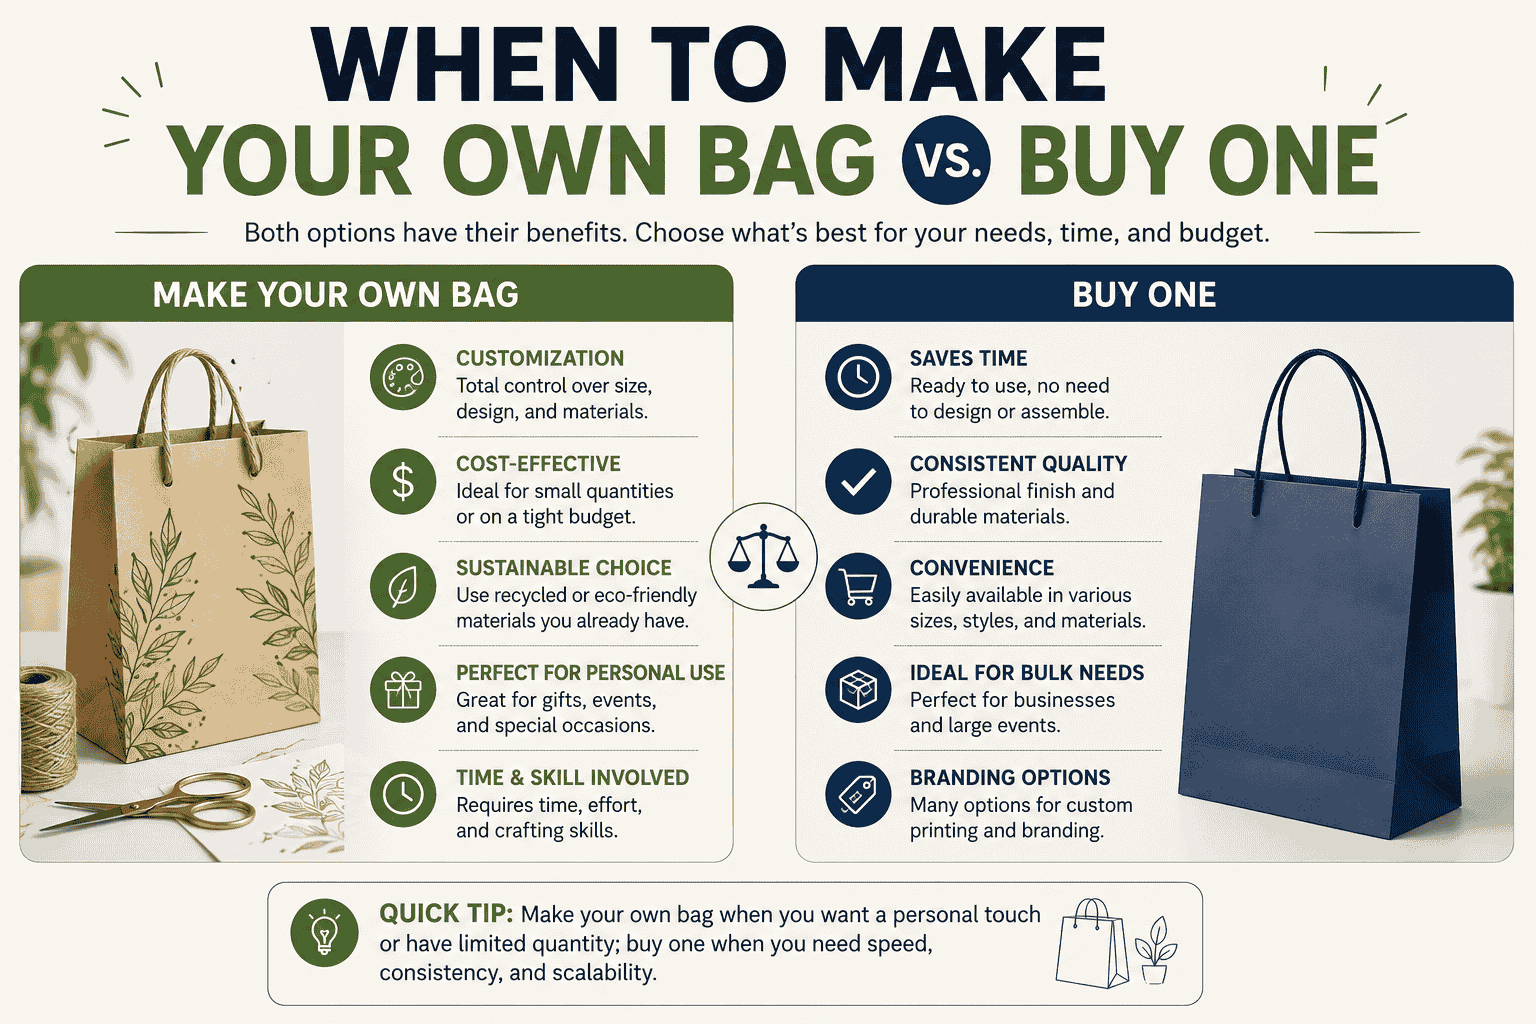
Making your own bag is perfect when:
- You have leftover wrapping paper from the same gift roll (matching bag and gift wrap looks very considered)
- You need an unusual size that store bags do not come in
- You want the bag to feel personal and handmade
- You have run out of bags at the last minute
A store-bought bag might be better when:
- The gift is very heavy (over 2 kg) and needs a bag with cord handles and a reinforced base
- You need a very large number of bags quickly
- The occasion calls for very specific shapes (wine bags, bottle bags, etc.)
There is no wrong answer. Both have their place. But knowing how to make a clean, solid bag from wrapping paper means you are never stuck without one.
Final Thoughts
A handmade gift bag made from wrapping paper is genuinely one of those things that sounds more complicated than it actually is. Once you have done it two or three times, the whole process takes under five minutes, and the result looks far more personal than anything mass-produced.
The key details that separate a great homemade bag from a scrappy one are: good-quality paper, a well-taped and truly flat base, a reinforced top rim, and handles that are knotted securely on the inside. Get those four things right, and everything else is decoration.
Next time you are standing at a table full of gifts with no bags in sight, you will know exactly what to do.