
Sealing mylar bags with a household clothes iron is one of the most common workarounds for people who don’t own a dedicated impulse sealer. It works — but only if you get the heat, technique, and prep right. Get any of those wrong and you’ll end up with a bag that looks sealed but lets air back in within a few weeks.
This guide walks through the full process, the mistakes that cause most seal failures, and how to tell whether your seal actually held.
What You’ll Need
- Mylar bags (5–7.5 mil is recommended for anything you’re storing longer than a few months)
- A standard clothes iron with the steam function switched off
- Oxygen absorbers, sized to your bag’s volume, if you’re storing food
- A flat, heat-safe surface (a wooden cutting board, countertop, or ironing board)
- A thin piece of cotton cloth or a sheet of parchment paper, to protect the bag and the iron’s soleplate
- A ruler or straight-edged piece of wood or cardboard (optional, but it makes the seal line much straighter)
Step-by-Step: Sealing a Mylar Bag with a Cloth Iron
- Preheat the iron on a dry setting. Turn off the steam function completely — any moisture in the seal area will weaken the bond or create a cloudy, brittle line that fails early. Set the dial to the cotton or linen setting (roughly medium-high heat) and let it heat fully before you start. Going in too cool is the single most common reason a first attempt fails.
- Fill the bag and leave a clear top margin. Add your contents, leaving at least 2–3 inches of empty, flat mylar at the top. This margin gives you room to work and keeps food or product away from the direct heat of the iron.
- Add oxygen absorbers if you’re storing food or organic material. Drop the correct-size absorber in just before sealing — they start pulling oxygen out of the air as soon as they’re exposed, so don’t let them sit around opened for long. Skip this step for non-food items like electronics, documents, or hardware.
- Push out as much air as possible. Flatten the bag from the bottom up with your hands (or a rolling motion) to force air out through the open top before you seal. The less air trapped inside, the better the bag will hold its shape and the less pressure will work against your seal over time.
- Lay the top flat against a straight edge. Place a ruler, a piece of scrap wood, or even a folded cardboard strip just below where you want the seal line to sit, then fold the mylar over it. This keeps the seal straight and prevents the classic problem of a wavy, uneven line that leaks at the low points.
- Cover the area with cloth or parchment paper. Lay your protective layer directly over the section you’re about to seal. This stops the mylar from sticking to the iron’s soleplate and keeps the plastic from scorching or bubbling under direct contact.
- Press down and glide slowly — don’t rush it. Apply firm, even pressure and move the iron across the top edge in one continuous, unhurried pass, holding each section for roughly 2–5 seconds. Going too fast is the second most common cause of a weak seal; the layers need enough time under heat to actually fuse.
- Go over the line a second time. A second pass along the same line, especially at the corners where three or four layers of mylar overlap, closes any gaps the first pass missed. Corners are the weakest point on almost every iron-sealed bag, so give them extra attention.
- Let the seal cool undisturbed, then check it. Don’t squeeze or move the bag for about 30 seconds while the seal sets. Once it’s cool, run your finger along the line — it should feel smooth, slightly ridged, and continuous, with no gaps, bubbles, or dull/cloudy patches.
How to Test Whether the Seal Actually Held
A seal that looks fine isn’t always airtight. Two quick checks:
- Press test: Push gently on the center of the bag. A properly sealed bag holds its shape and pushes back slightly, like a firm pillow. If it collapses or you hear/feel air escaping near the seal line, it hasn’t sealed.
- 24-hour check: If you added oxygen absorbers, the bag should pull in tight and go rigid within about a day as the oxygen is absorbed and not replaced. A bag that stays soft and puffy usually means the seal is letting air back in.
If either test fails, cut off the old seal line and redo it about half an inch below.
Common Mistakes That Ruin an Iron Seal
| Mistake | What it causes |
| Steam left on | Moisture weakens the bond, leaves a cloudy or brittle seal |
| Iron too cool | Layers don’t fully fuse; seal looks done but peels apart |
| Moving too fast | Uneven heating; gaps along the line |
| Wrinkled or bunched mylar at the fold | Pinholes and micro-gaps at the crease |
| No protective cloth layer | Scorched plastic, sticking, uneven melt |
| Skipping the corners | Corners are multi-layer and need the most heat exposure |
Cloth Iron vs. Hair Straightener vs. Impulse Sealer
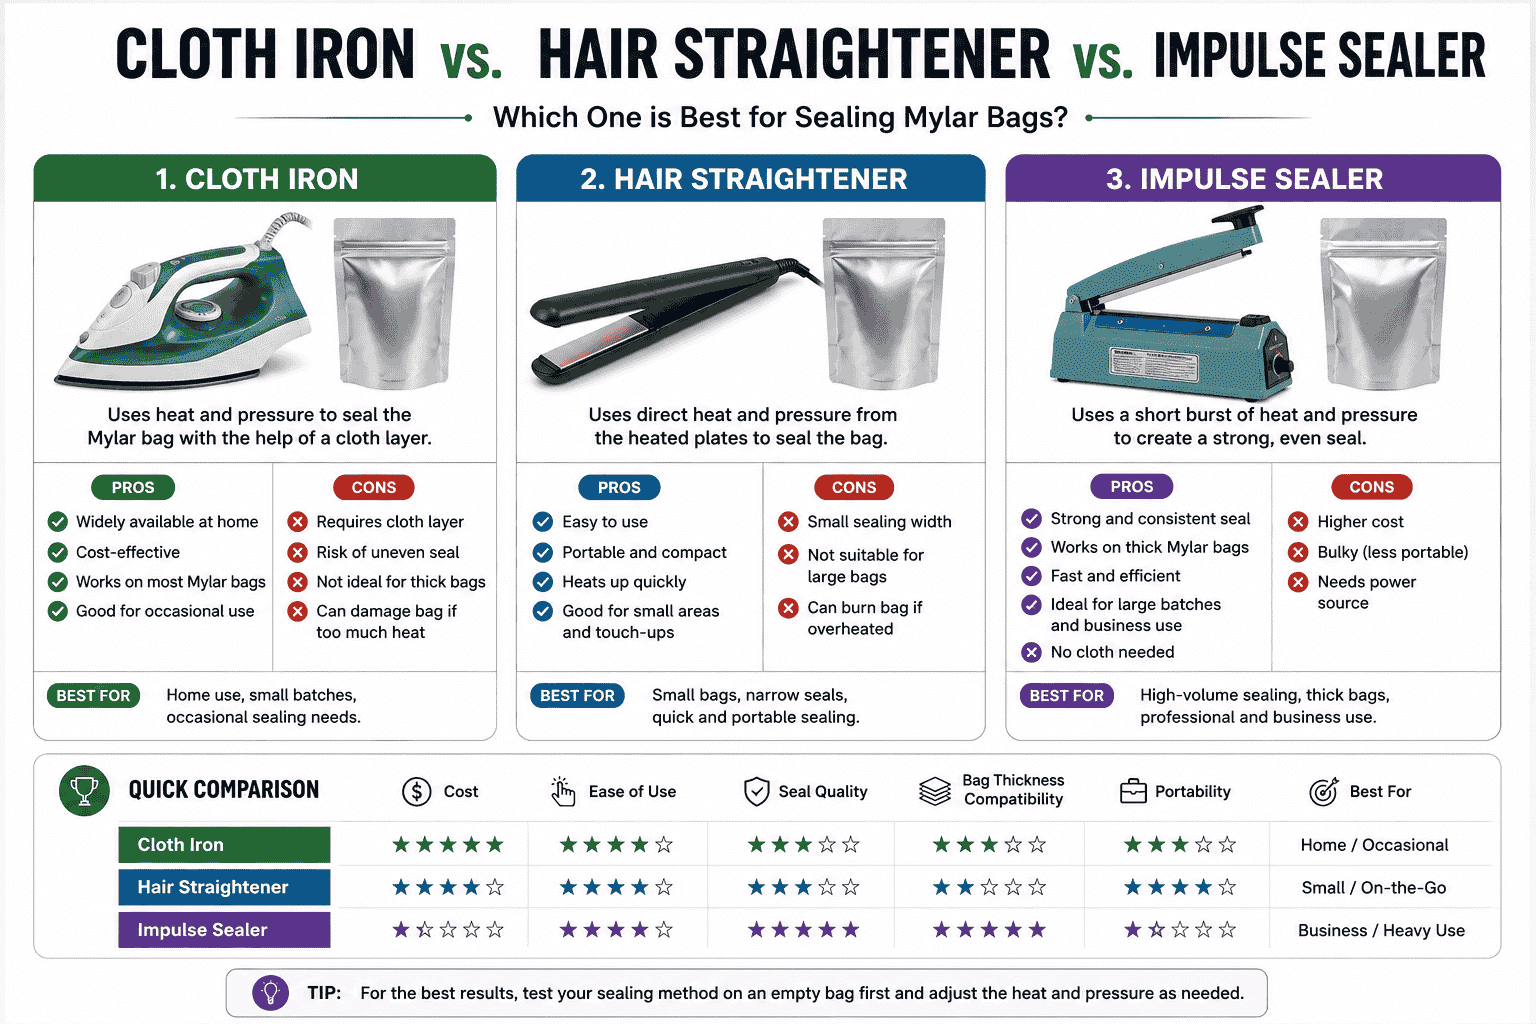
A cloth iron is a fine, low-cost option for occasional or small-batch sealing, but it’s worth knowing where it falls short of purpose-built tools:
| Tool | Best for | Limitation |
| Clothes iron | Occasional use, small batches, no upfront cost | Inconsistent heat/pressure, slower, wider seal line |
| Hair straightener | Small pouches, zipper-top bags | Narrow sealing surface, limited to small bags |
| Impulse/heat sealer | Frequent use, larger bags, long-term storage | Upfront cost, but gives a consistent, repeatable seal every time |
If you’re sealing bags regularly — for a business, bulk food storage, or anything you’re relying on for years of shelf life — a dedicated impulse sealer removes most of the variables that cause iron seals to fail.
Final Thoughts
A cloth iron is a genuinely usable way to seal mylar bags at home, and for occasional or small-batch needs it’s hard to beat for cost. The technique just needs a bit of care: dry heat, a protective cloth layer, a slow and even pass, and a real check afterward rather than assuming the bag is done.