
A Comprehensive Guide on Boxes Template and How to Make It!
Every custom box starts as a flat piece of paper before it becomes a 3D container. That flat layout is the template, and getting it wrong is one of the most expensive mistakes a small brand can make in packaging — a single miscalculated panel can throw off an entire print run before anyone notices.
This guide breaks down what a box template does, the styles most businesses actually use, and a practical process for building one, whether you’re doing it by hand for a small batch or preparing a file to send to a manufacturer.
What a Box Template Actually Is
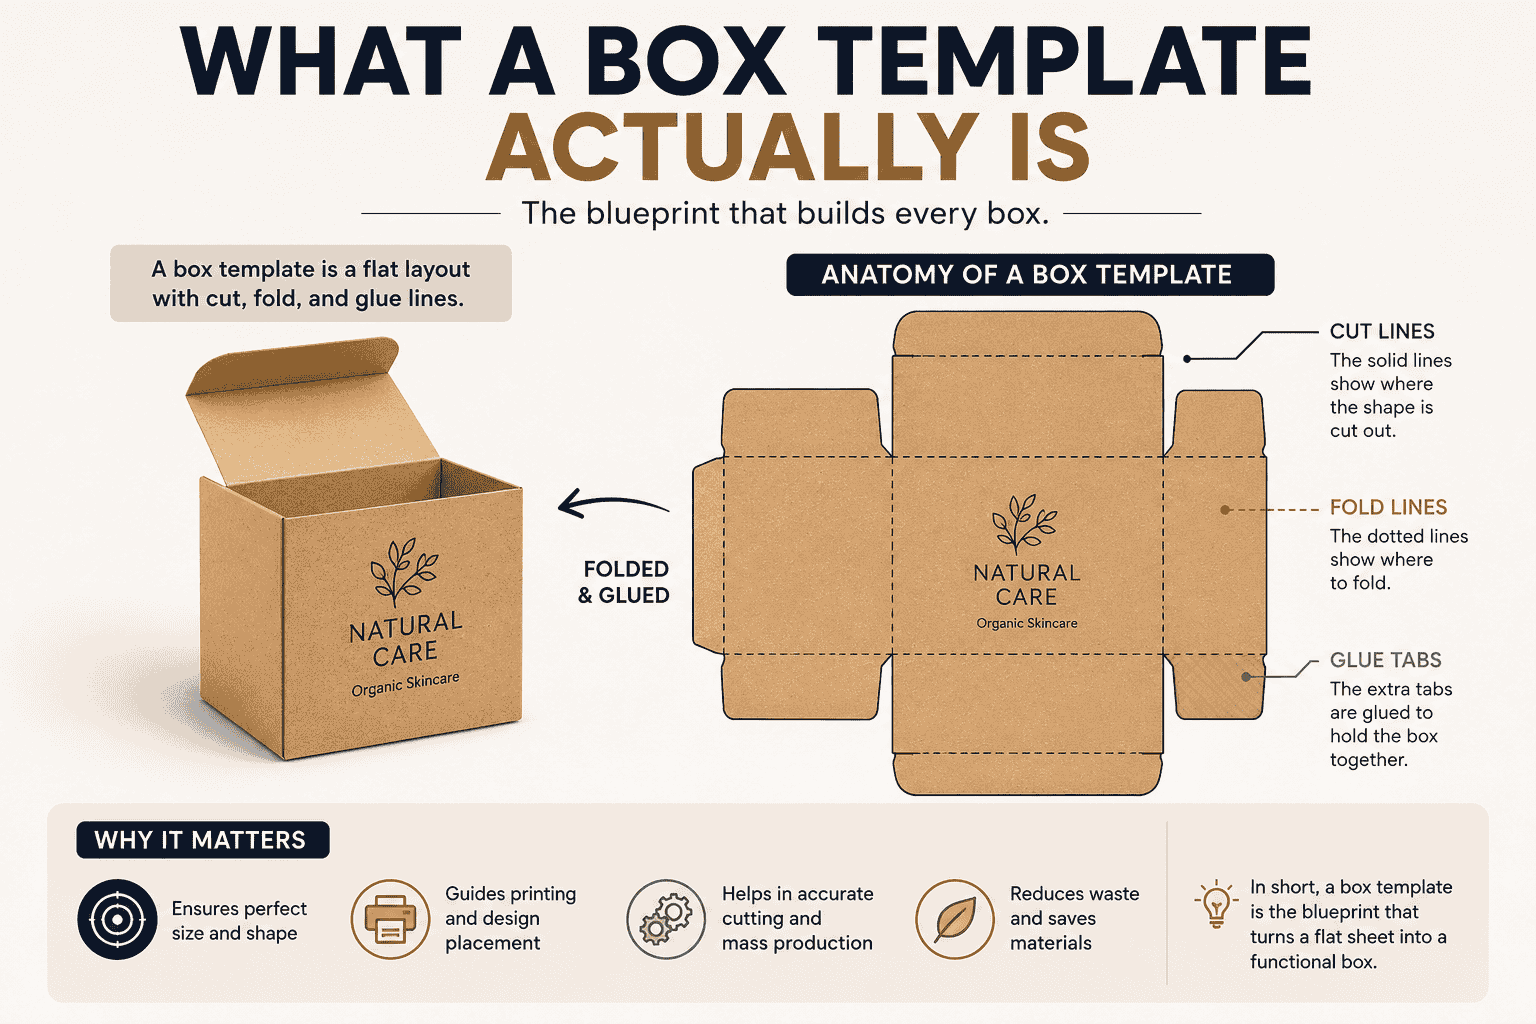
A box template (sometimes called a dieline) is a two-dimensional pattern that shows every panel, flap, cut line, and fold line needed to assemble a box. Solid lines mark where the material gets cut; dashed or dotted lines mark where it gets scored and folded. Once the layout is finalized, it’s used to create the cutting die — the tool that stamps the shape out of cardboard or paperboard at scale.
Think of it the same way you’d think of a sewing pattern. The pattern itself isn’t the finished garment, but every seam, dart, and cut in the final product depends on it being accurate. A box template works the same way: the finished box can only be as consistent as the template it came from.
Why Templates Matter More Than People Expect
A lot of first-time packaging buyers assume the template is just a formality — something the printer handles in the background. In practice, it affects three things directly:
Material cost. A template that doesn’t account for material thickness correctly (especially with corrugated board) leads to boxes that don’t close properly, which often means a second production run.
Print accuracy. If your artwork doesn’t account for bleed and fold-line safety margins, logos and text can end up cut off or creased right through the middle.
Shipping cost. Carriers charge dimensional weight based on box size, not actual product weight. A template built to the product’s real dimensions, rather than a generic size, can meaningfully cut per-unit shipping costs when you’re sending hundreds of packages a month.
The Main Box Template Styles
Different products call for different structures. Here’s a rundown of the ones you’re most likely to need:
- Straight tuck end (STE): The classic folding carton. Cheap, fast to fold, and widely used for cosmetics, supplements, and small retail goods.
- Reverse tuck end (RTE): Similar to STE but with the front and back flaps tucking in opposite directions, giving a slightly more finished look for retail shelf display.
- Auto-bottom (auto-lock): The base locks into place with a simple push, which speeds up hand-packing significantly. Common for food items and gift sets.
- Die-cut mailer: A single piece that folds into both the box and its lid, which is why it’s the default choice for most e-commerce shipping boxes.
- Gable box: The tent-shaped box with a fold-out handle on top, often used for takeout containers or party favors.
- Window box: Includes a die-cut opening, usually fitted with a clear film, so the product is visible without opening the packaging.
- Sleeve and tray: A two-piece setup where a sleeve slides over an inner tray. Slower to assemble but gives a more premium unboxing moment, which is why it shows up a lot in gift and subscription box packaging.
Choosing the wrong style up front usually means starting the whole dieline over later, so it’s worth deciding this before any measuring begins.
Step-by-Step: Building a Box Template
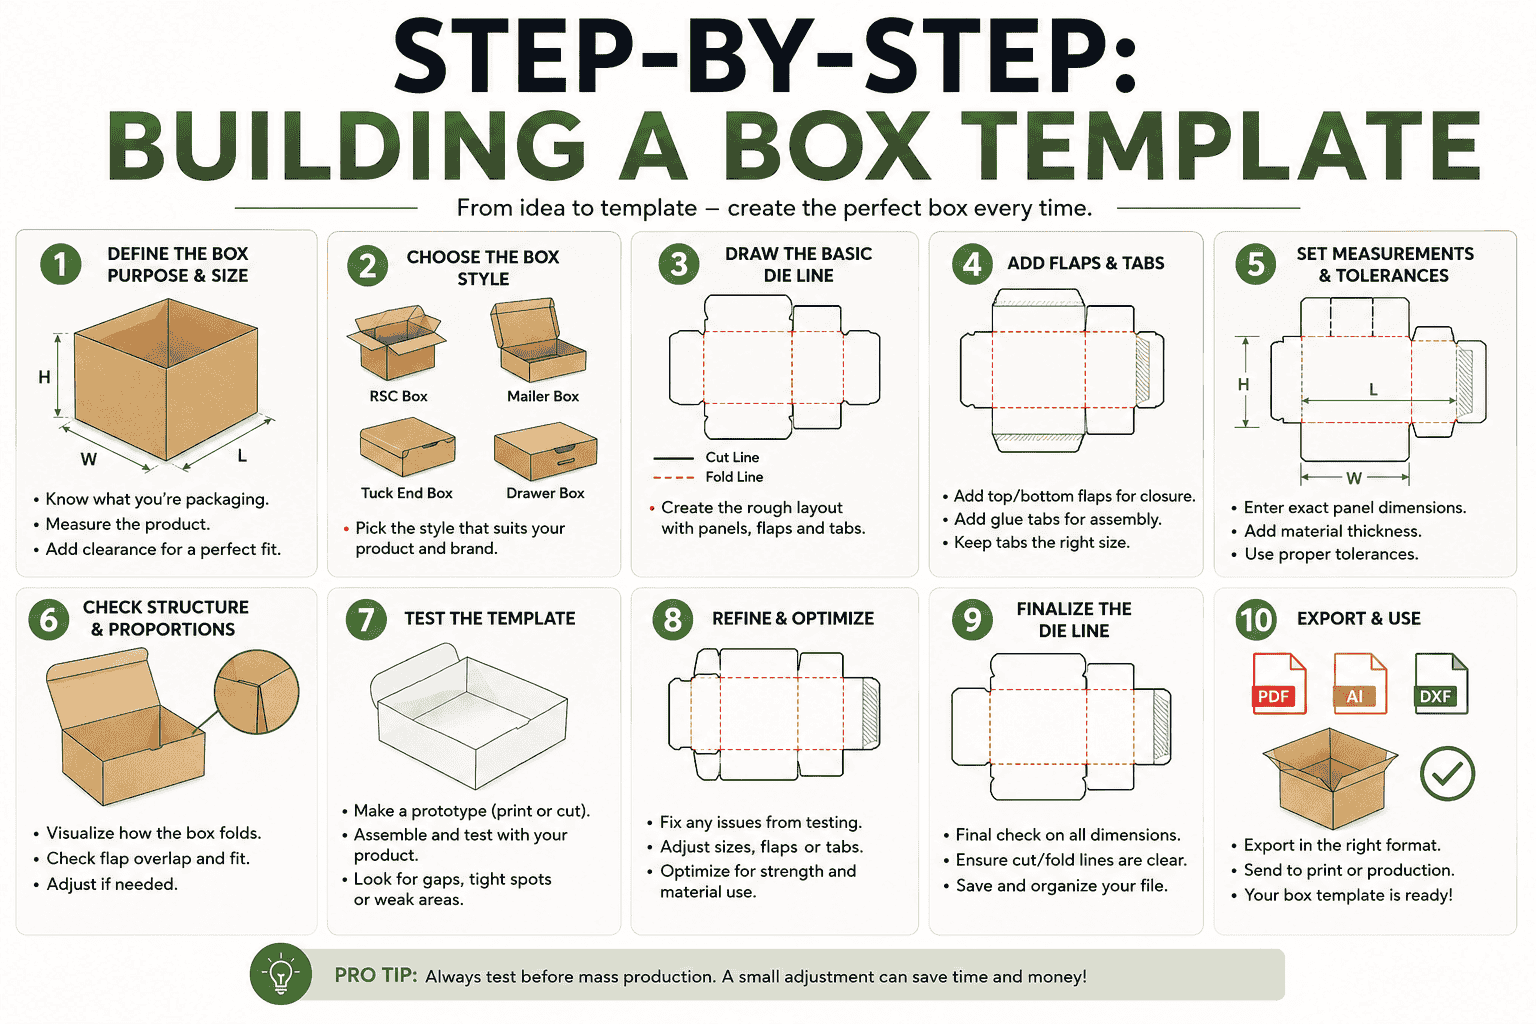
- Take accurate product measurements. Length, width, and height, measured at the widest points. If the product is irregularly shaped, measure at its largest cross-section in each direction.
- Add internal clearance. A general starting point is 3–6 mm added to each dimension so the product isn’t jammed in tight but also doesn’t have enough room to shift and get damaged in transit. Fragile items or anything shipping with an insert may need more.
- Pick your material and flute. Lightweight retail boxes typically use SBS paperboard. Shipping boxes usually need corrugated board, most often B-flute or E-flute for smaller cartons, since these hold up to handling without adding excess bulk.
- Lay out the panels in sequence. Front, back, two sides, top, and bottom, plus a glue flap along one edge. Vector software like Adobe Illustrator is the standard tool here, though a simple box can be sketched on graph paper for a first pass.
- Differentiate cut lines from fold lines. This is the step most DIY templates get wrong. Solid lines should represent anything the die will cut all the way through; dashed lines represent score lines that fold but don’t separate.
- Build in bleed and safety margins for printed artwork. A standard bleed is around 3 mm past the cut line, so there’s no white edge if the cut shifts slightly during production. Keep important text and logos at least 3–5 mm inside any fold line so nothing gets creased through the middle.
- Cut and fold a physical prototype. Do this before sending anything to print. A prototype cut from spare cardstock or cardboard is the fastest way to catch a sizing mistake — much cheaper than discovering it after a few thousand units have already been cut.
- Export as a vector file. AI, EPS, or print-ready PDF are the standard formats manufacturers expect. Raster formats like JPG or PNG lose precision on cut lines and generally won’t be accepted for die-cutting.
If building a dieline from scratch isn’t practical, most packaging manufacturers, including ours, will produce a custom template at no charge once you share your product’s dimensions and preferred box style — often the faster route, especially for a first order.
Common Mistakes to Avoid
- Skipping the physical prototype. A design that looks correct on screen can still fail once folded, especially around glue flaps and corners.
- Forgetting material thickness in calculations. Corrugated board in particular adds real thickness that needs to be factored into internal dimensions, not just the flat panel measurements.
- Using low-resolution or raster artwork files. These don’t scale cleanly and can cause blurry or misaligned printing at the cut line.
- Ignoring bleed and safety margins. This is the single most common cause of text or logos getting clipped or creased in the final product.